XBOFS.win
XBox One Fight Sticks for Windows
This project is maintained by OOPMan
Control Binding Guide
The Control Binding system allows you to customize the mapping of input data received from your attached XBO Fight Stick to the input data sent to the Virtual XBox 360 Controller.
Control Bindings are configured using profiles. Multiple profiles can be created and each profile can define its own mappings. This allows you to configure specific profiles for specific applications.
Profile information is associated with a specific XBO Fight Stick by way of its unique hardware information (Manufacturer, Product and Serial Number). This means that no matter what order you plug in your XBO Fight Sticks the correct profile information will always be loaded for that device.
The Control Binding system also introduces the concept of alternate bindings. Simply put, this enables you to configure two different bindings for a given control on your XBO Fight Stick. Access to the alternate binding for a given control is provided by the XBox Guide Button which has been repurposed to function as a modifier button, similar to the Shift key on your keyboard.
The utility of the Control Binding system may not immediately obvious but once you consider that whereas a XBO Fight Stick provides 15 unique inputs (11 buttons and 4 directions) the Virtual XBox 360 Controller has many more (2 analog thumbsticks, 2 analog triggers, 4 directions and 11 buttons) the possibilities might be a little clearer, especially when you consider that certain games only function correctly when analog directional input data is received…
Finally, as a XBO Fight Stick user you may have concerns as to whether or not the Control Binding system as has any performance impact on the flow of data from your device to the software you are using. You can rest easy in the knowledge that due to optimizations introduced in v1.0.0 of XBOFS.win there is no impact terms of performance when using the Control Binding system.
Without further ado, let’s explore!
First Steps
In order to enable the Control Binding system for your XBO Fight Stick the Binding checkbox needs to be enabled in the Device tab for your XBO Fight Stick and a Profile needs to be added.
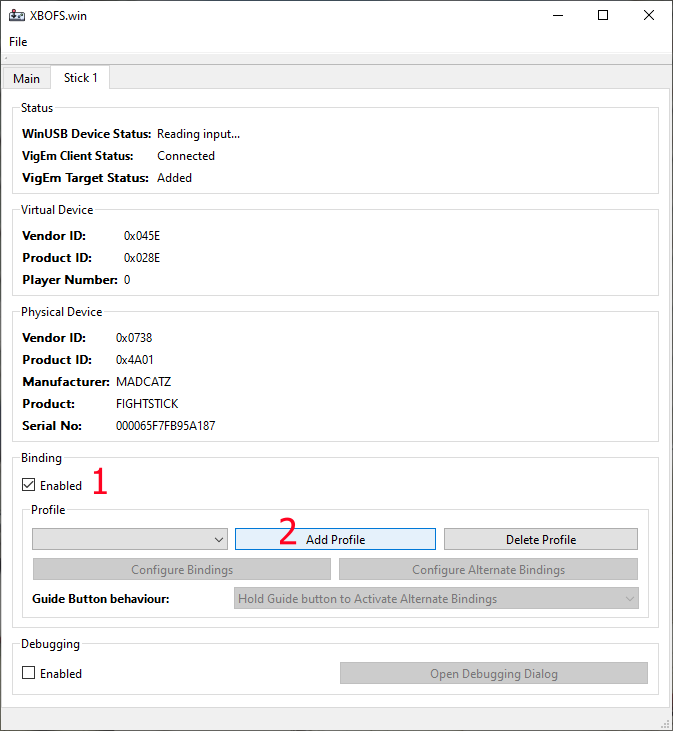
- The Binding checkbox
- The Add Profile button
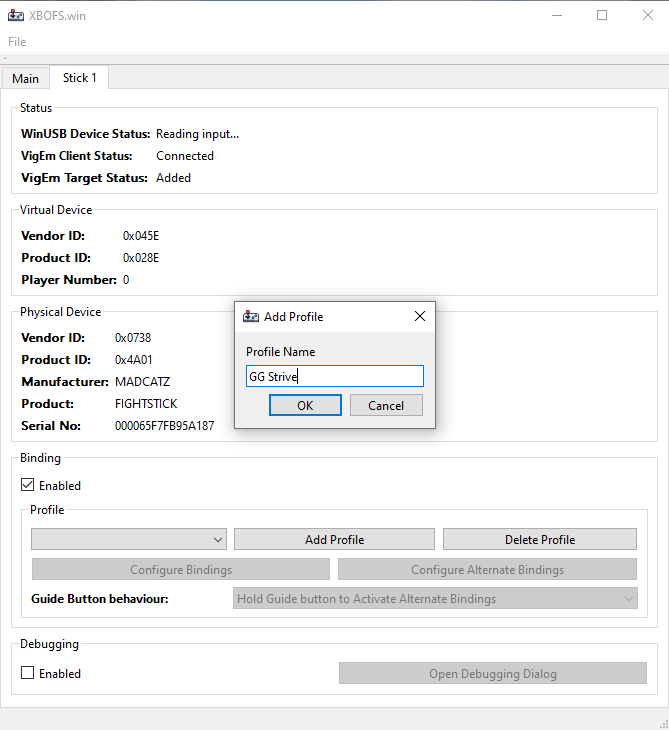
Clicking the Add Profile button will present a dialog allowing you to enter a name for the Profile. The name of your profile must not exceed 256 characters, if it does the trailing characters will be removed.
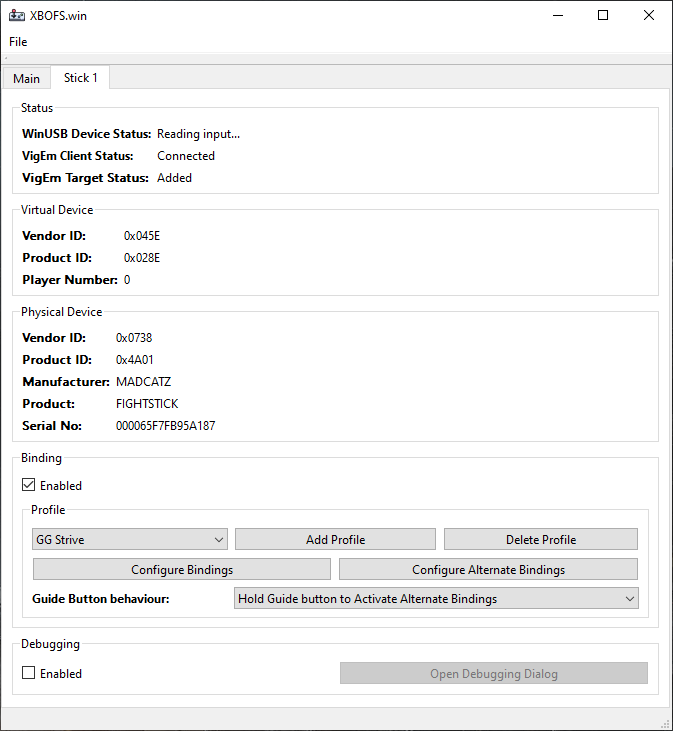
Once you have created a profile the remaining elements of the Control Binding interface become available.
Control Binding interface
This section will provide a quick run-through of the whole Control Binding interface.
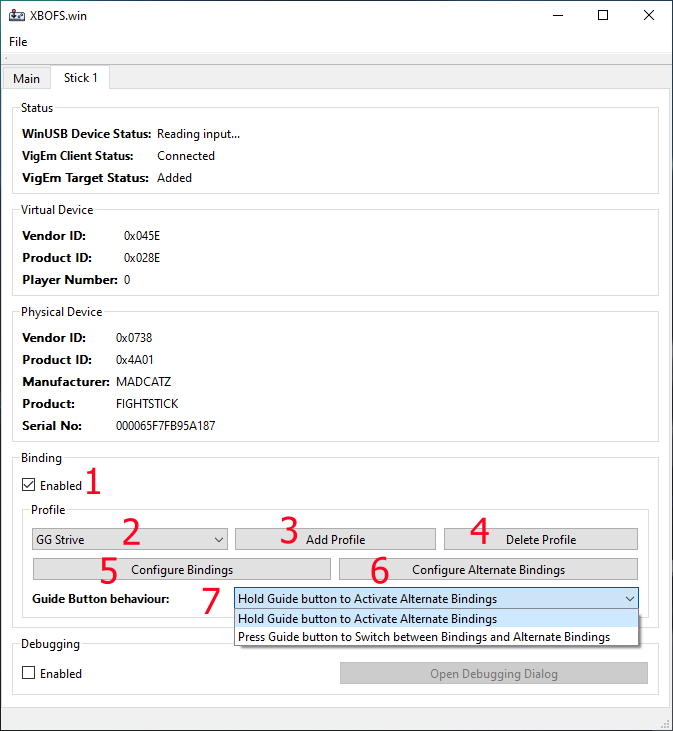
- The Binding checkbox controls whether the Control Binding system is enabled or disabled. When disabled no other controls in the Control Binding interface will be usable
- The Profile drop-down allows you to select the active set of Control Bindings
- The Add Profile button is used to create a new Control Binding configuration. If you create a new profile with the same name as a previously deleted profile the application will simply restore that previously deleted profile
- the Remove Profile button is removed to remove an existing Control Binding configuration
- The Configure Bindings button will open the binding configuration dialog
- The Configure Alternate Bindings button will open the alternate binding configuration dialog
-
Finally, the Guide Button Behaviour drop-down is used to configure the behaviour of the XBox Guide Button with regards to activating the alternate control bindings.
By default the alternate control bindings are activated while the XBox Guide Button is held down, very similar to the Shift key on a keyboard.
The second behaviour option for the XBox Guide Button is a toggle-mode. In this mode the XBox Guide Button behaves similarly to the Caps Lock key on a keyboard, each press-and-release will cause the control bindings to switch between regular and alternate bindings
Binding Configuration Dialog
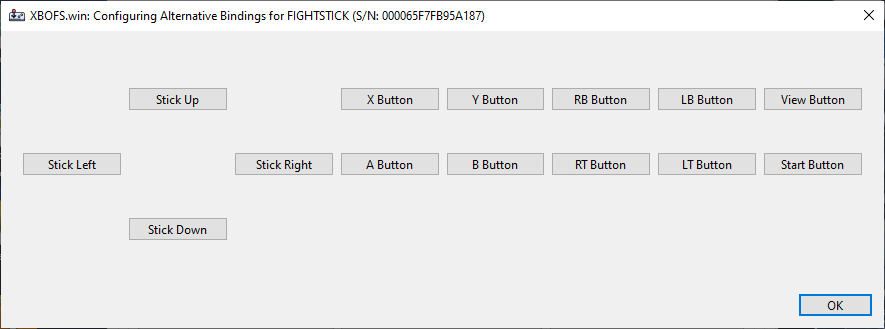
The Binding Configuration dialog presents you with a visual representation of the controls available for binding on the XBO Fight Stick.
The title for this dialog will reflect the details of device being configured as well as whether the regular or alternate bindings are being configured.
The XBox Guide Button is not available in this dialog as when Control Binding is enabled the behaviour of the said button is used to control whether regular or alternate bindings are active.
Clicking on a control button in this dialog will open the Control Binding dialog for that button.
Control Binding Dialog
The Control Binding dialog is used to configure the input data that will be sent to the Virtual XBox 360 Controller when the given button or direction is received from the XBO Fight Stick.
Note that the title for this dialog will indicate which button on the XBO Fight Stick is being configured and whether the regular or alternate binding is being configured.
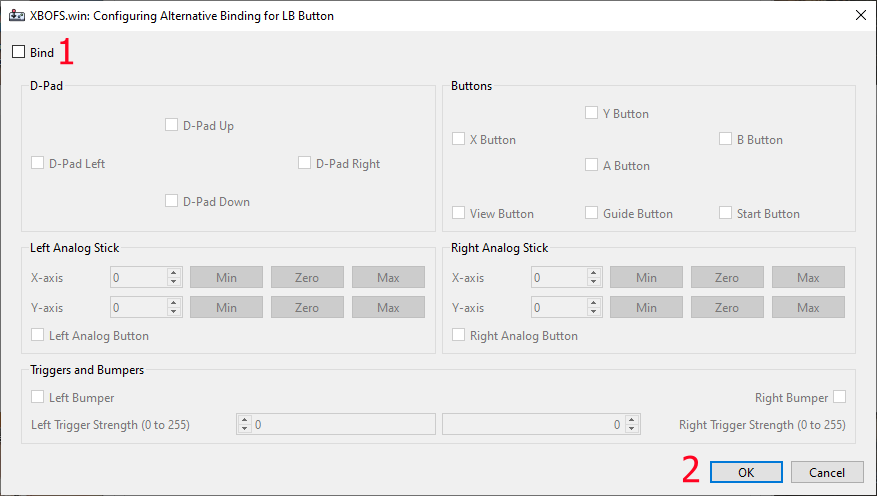
-
The Bind checkbox controls whether the button being configured will use a custom binding. In the event that this checkbox is not checked, the default binding will be used. The default bindings are as follows:
- Stick Up binds to D-Pad Up
- Stick Down binds to D-Pad Down
- Stick Left binds to D-Pad Left
- Stick Right binds to D-Pad Right
- A Button binds to A Button
- B Button binds to B Button
- X Button binds to X Button
- Y Button binds to Y Button
- LB Button binds to Left Bumper
- RB Button binds to Right Bumper
- LT Button binds to Left Trigger with a Strength of 255
- RT Button binds to Right Trigger with a Strength of 255
- Start Button binds to Start Button
- View Button binds to View Button
The default alternate bindings are as above with one exception:
- View Button binds to Guide Button
-
Clicking the Ok button will cause the configuration to be saved whereas the Cancel button will discard the configuration. The application will then return to the Binding Configuration Dialog dialog
When Bind is checked the remaining controls in the dialog become enabled:
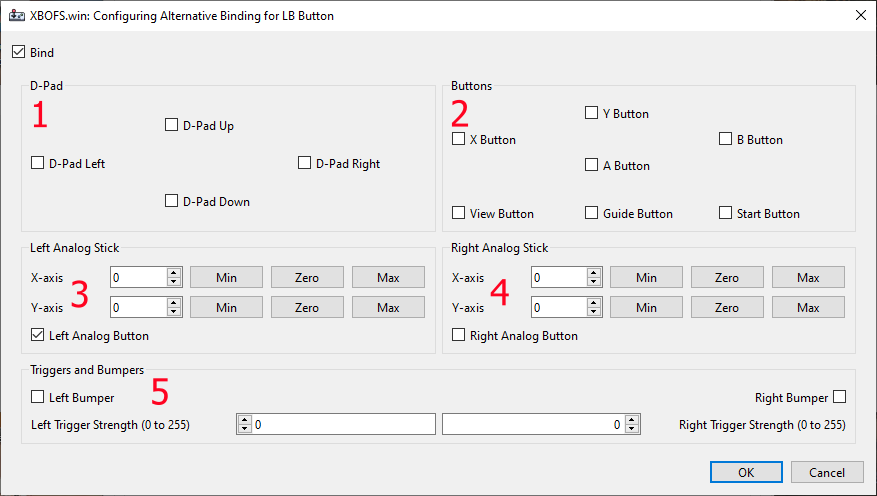
- The D-Pad section handles the binding of D-Pad directional inputs
- The Buttons section handles the binding of the large majority of the other button-style inputs, including the Guide Button
- The Left Analog Stick section handles binding of the X and Y axis of the left thumbstick as well as the left thumbstick button input
- The Right Analog Stick section handles binding of the X and Y axis of the right thumbstick as well as the right thumbstick button input
- The Triggers and Bumpers handles binding of the left and right triggers and bumpers
Notes on the Left/Right Analog Stick sections
-
The minimum value for a given axis is -32768
- For the X-axis this corresponds to the left-most position of the thunmbstick
- For the Y-axis this corresponds to the bottom-most position of the thumbstick
-
The maximum value for a given axis is 32767
- For the X-axis this corresponds to the right-most position of the thumbstick
- For the Y-axis this corresponds to the upper-most position of the thumbstick
-
The spinner controls on the inputs increment/decrement the value in steps of 8192
Notes on the Triggers and Bumpers section
- The minimum trigger strength value is 0, which corresponds to the trigger being free
- The maximum trigger strength value is 255, which corresponds to the trigger being held completely
- The spinner controls on the inputs increment/decrement the value in steps of 255
Sample Configurations
The sample configurations list below exist to give you an idea as to what the Control Binding system can be used for.
Guilty Gear Strive
-
Alternative bindings
- LB button is bound to Left Analog Button
- LT button is bound to Right Analog Button
The purpose of this configuration is to allow the Left and Right analog buttons to be used in the Training mode to trigger the Start Recording and Stop Recording actions.
Fun fact, this configuration was the reason I did all the work on the Control Binding system as GG Strive’s inability to allow multiple button bindings to be used to trigger the Start/Stop Recording actions made it impossible for me to use the Recording function in Training without overriding other bindings which annoyed me a lot.
Mortal Kombat 11
- Guide Button behaviour set to Toggle
-
Alternative bindings
- Stick Up is set to Left Analog Stick Y-axis 32767
- Stick Down is set to Left Analog Stick Y-axis -32768
- Stick Left is set to Left Analog Stick X-axis -32768
- Stick Right is set to Left Analog Stick X-axis 32767
- RB is set to Right Analog stick X-axis -32768
- LB is set to Right Analog stick X-axis 32767
The purpose of this configuration is to allow the Fight Stick to be used to navigate in the Krypt mode. The Kyrpt mode uses the Left Analog Stick for movement while the Right Analog Stick controls the camera. Looking up and down is not that important but being able to rotate the view left and right is. This configuration allows you to switch to the Alternate bindings and navigate the game world in the Krypt mode without needing to plug in a normal game controller. When you want to play the rest of the game you switch back to the Regular bindings.